How to Prepare a Tech Pack for Activewear: Templates and Best Practices
A tech pack — short for technical package — is the definitive blueprint that communicates every detail of your garment design to a manufacturer. It transforms your creative vision into a precise, repeatable set of specifications that factories use to produce samples and bulk orders. For activewear brands, a well-prepared tech pack is the single most important document in the entire manufacturing process. Without a tech pack, factories are forced to make assumptions about your design intent. These assumptions inevitably lead to incorrect samples, wasted weeks of back-and-forth communication, and costly mistakes. A comprehensive tech pack eliminates ambiguity by providing clear measurements, fabric specifications, construction details, color references, and branding instructions. Everyone involved in production works from the same numbers, which means samples arrive closer to your vision on the first attempt and bulk production matches the approved sample. In the fast-paced world of activewear manufacturing, speed to market matters. A complete tech pack accelerates the sampling process, reduces revision rounds, and helps you control production costs. Whether you are a first-time brand founder or an experienced product developer, mastering the tech pack is essential for successful manufacturing partnerships. A complete activewear tech pack consists of several interrelated sections, each serving a specific purpose in the production process. Understanding what to include in each section ensures that your manufacturer has all the information needed to produce your garment correctly. Technical Flat Sketch: This is the foundation of your tech pack. A flat sketch is a two-dimensional, proportionally correct line drawing of your garment shown from the front and back. Unlike fashion illustrations, flat sketches are technical drawings that clearly depict seams, panels, darts, pockets, zippers, and other construction elements. Each design feature should be visible and clearly labeled with callouts pointing to specific details. Use black and white line art without shading — this keeps the focus on construction rather than artistic presentation. Bill of Materials (BOM): The BOM is a comprehensive list of every material needed to construct one complete garment. It includes main fabric, lining, elastic, drawcords, zippers, threads, labels, hang tags, and packaging materials. For each item, specify the supplier, material composition, color, weight (GSM), width, and any certifications required (such as OEKO-TEX or GOTS). A detailed BOM prevents the factory from substituting materials that may not meet your quality or performance standards. Measurement Specification Sheet: This section contains a table of all critical measurement points for each size in your range. Standard activewear measurement points include chest width, waist width, hip width, inseam length, outseam length, sleeve length, armhole depth, and neck width. Each measurement should include a tolerance range (typically ±0.5 cm for critical points). Include a diagram showing exactly where each measurement is taken to avoid interpretation errors. Creating a professional flat sketch is the first step in building your tech pack. While Adobe Illustrator is the industry standard tool for this purpose, there are several accessible options for designers at every skill level. Using Adobe Illustrator: Create a new document with artboards sized to your garment proportions. Use the pen tool to draw the garment outline, starting with the front view. Add internal design lines, seams, and details using consistent stroke weights. Industry standard practice uses a 0.5pt stroke for outer edges and 0.25pt for internal details. Label each component with text callouts using a consistent font and size. Alternative Tools: If you do not have access to Adobe Illustrator, several alternatives can produce professional results. CorelDRAW, Affinity Designer, and even vector-based tools like Inkscape (free) can create industry-standard flat sketches. Some online platforms offer template libraries specifically for activewear, allowing you to customize pre-made flat sketches to match your designs. Key Elements to Include: Your flat sketch must show the garment laid flat as if it were on a table, not on a body. Include front and back views as a minimum. For complex designs, add side views and detail callouts showing specific construction elements such as pocket openings, seam types, elastic channels, and logo placement. Each callout should include a reference number that corresponds to a note in the construction details section. CAD Specifications: If you are working with a professional pattern maker or manufacturer, they may request a CAD (Computer-Aided Design) file format such as .AI or .EPS. These vector formats allow the factory to import your sketches directly into their pattern-making software, reducing manual tracing errors. Fabric specification is the most technically demanding section of an activewear tech pack. Vague descriptions like "soft stretchy material" are useless to a manufacturer. You must provide precise, measurable specifications that leave no room for interpretation. Fabric Composition: Specify the exact fiber percentages, such as "75% Nylon, 25% Spandex" or "92% Recycled Polyester, 8% Elastane." Include the fabric construction type (jersey, interlock, French terry, mesh) and the weight in GSM. For performance activewear, also specify the finish type — moisture-wicking, anti-microbial, UPF-rated, brushed, or garment-dyed. Provide the Pantone color reference for each color variant in your collection. Elastic and Trim Specifications: For waistbands, cuffs, and leg openings, specify the elastic type (knitted, woven, or rubber), width, thickness, and stretch percentage. Include details for drawcords (length, material, tip type), zippers (length, type, tooth material), and any hardware such as sliders, cord locks, or eyelets. Thread and Stitching: Specify thread type (polyester, cotton-covered polyester, or nylon), thread weight (e.g., Tex 40, Tex 60), and color matching requirements. For activewear, flatlock seams require specialized thread that matches the fabric's stretch characteristics. Label and Branding: Include specifications for all labels — woven brand labels, printed care labels, size labels, and hang tags. Provide artwork files (in vector format), dimensions, placement diagrams showing exact position on the garment, and attachment methods (sewn-in, heat-press, or adhesive). The size chart is where your garment's fit is defined. For activewear, proper sizing is critical because performance and comfort depend on the garment fitting correctly during movement. Determining Your Size Range: Decide the size range you will offer — for example, XS to XL or XS to 3XL. Each size requires a complete set of measurements. Start with your sample size (usually M or size 8) and grade up and down from there. If you are offering plus sizes, use separate grading rules rather than simply extending your straight-size grading curve. Point of Measurement (POM): Create a comprehensive POM table listing every measurement point. For leggings, common POMs include waistband width (relaxed and stretched), hip width (at widest point), inseam length, outseam length, front rise, back rise, thigh width (1 inch below crotch), knee width, leg opening, and waistband height. Each POM should have a corresponding measurement for every size in your range. Grading Rules: Grading is the incremental measurement difference between sizes. For example, if your chest measurement increases by 1 inch between sizes S and M, the same 1-inch increment should apply between M and L, though you may adjust this for plus sizes. Document the grading rules clearly so the factory can scale patterns accurately across the full size range. Tolerance Allowances: Every measurement needs an acceptable tolerance range. Typical tolerances for activewear are ±0.5 cm for critical points (waist, inseam, rise) and ±1.0 cm for non-critical points (hem width, pocket depth). Clearly marking tolerances prevents unnecessary rejections of garments that are functionally identical to the specification. The construction section tells the manufacturer exactly how to assemble your garment. This is where fit and durability are determined, and where detailed specifications prevent costly misinterpretations. Stitch Types and Seam Allowances: Activewear typically uses several stitch types depending on the garment area and performance requirements. Flatlock stitches are used for inner leg seams and side seams to prevent chafing. Coverstitch is used for hems and necklines. Overlock stitches seal raw edges. Specify the stitch type, stitches per inch (SPI), seam allowance width, and thread type for each seam in the garment. Reinforcement Areas: Identify high-stress areas that require reinforcement — crotch gusset, shoulder seams, waistband attachment points, and pocket corners. Specify the type of reinforcement (bar tack, double-stitch, or reinforced panel) and provide a close-up diagram showing construction details. Waistband Construction: For activewear bottoms, the waistband is the most technically demanding component. Specify the waistband width, number of layers, elastic channel construction, elastic width and tension, and whether the waistband is folded over or attached as a separate piece. Include a cross-section diagram showing the waistband layering. Hem and Edge Finishing: Specify hem type (coverstitch, hem tape, or raw-edge), hem width, and any special finishing requirements such as bonding or ultrasonic welding. For performance activewear, hem finishing affects both durability and comfort. Color accuracy is essential for brand consistency. Digital color codes (HEX, RGB, CMYK) vary significantly between screens and are insufficient for fabric dyeing. Instead, use physical color standards that factories can match precisely. Pantone References: Specify colors using Pantone Textile Paper (TPG) or Pantone Cotton (TCX) references. These are industry-standard color systems designed for fabric matching. For each color in your collection, provide the Pantone code alongside a digital reference for visualization purposes only. Note that Pantone TPG/TCX swatches should be provided as physical swatches when possible. Lab Dip Process: When working with custom colors, the factory will create lab dips — small samples of fabric dyed to match your specified Pantone reference. You must approve the lab dip before bulk fabric dyeing begins. Allow 5–7 business days for lab dip development and approval. Request lab dips under multiple lighting conditions (daylight, store lighting, and home lighting) to ensure the color works across all environments. Color Placement: Your tech pack should include a colorway diagram showing which components receive which color. For example, the main body might be "Midnight Navy" while contrast panels are "Electric Coral." Use color callouts on your flat sketch to indicate color placement unambiguously. Branding elements — logos, labels, hang tags, and packaging — are what differentiate your product on the retail floor. Your tech pack must specify each branding element precisely to ensure consistency across your entire production run. Logo Placement and Size: Provide a diagram showing exact logo placement on the garment, with measurements from reference points (e.g., center front, 3 inches below neckline). Specify logo dimensions, orientation, and rotation if applicable. Include vector artwork files (.AI or .EPS) for print-ready logos. Logo Application Method: Specify how the logo will be applied — heat transfer, screen printing, embroidery, silicone print, or woven label. Each method has different cost implications and durability characteristics. For activewear, silicone prints are popular for their stretch compatibility, while embroidery offers premium appearance but may not work well on high-stretch areas. Care Labels and Size Labels: Specify the content of care labels (washing instructions, fabric composition, country of origin) and size labels. Provide artwork files, dimensions, placement locations, and attachment methods. Consider tagless heat-press labels for comfort, especially in activewear where traditional sewn labels can cause irritation. Packaging Specifications: Include packaging instructions — how each garment is folded, whether it is poly-bagged, the hang tag attachment location, and any branded packaging materials such as tissue paper, stickers, or mailer boxes. Even experienced product developers make mistakes in their tech packs. Being aware of the most common errors can save you time, money, and frustration during the sampling and production process. Vague Fabric Specifications: This is the most common and costly mistake. Describing a fabric as "soft and stretchy" is meaningless to a factory. Always include composition percentages, GSM, finish type, and stretch percentage. If you are referencing a specific fabric from a mill, include the mill name and fabric style number. Missing Size Chart: Some brands provide measurements for only one size and expect the factory to grade up and down automatically. This inevitably leads to incorrect proportions, especially for plus sizes. Always provide a complete size chart with measurements for every size in your range. Poor Logo Placement Documentation: Describing logo placement in words ("logo on the left chest") without measurements leaves too much room for interpretation. Always provide a diagram with exact measurements from fixed reference points. No Pantone References: Using digital color codes for fabric colors guarantees color mismatches. Physical Pantone TPG or TCX references are essential for accurate color matching in textile production. Ignoring Packaging: Many brands forget to specify packaging requirements until after production is complete. Include packaging instructions in your initial tech pack to avoid last-minute surprises and additional costs. You do not need to create a tech pack from scratch. Several templates and tools are available to help you build professional tech packs efficiently. Many activewear manufacturers also offer tech pack development services as part of their product development process. Spreadsheet Templates: Google Sheets and Microsoft Excel templates are the most accessible option for first-time brand founders. These templates include pre-formatted tables for measurements, BOM, colorways, and construction details. Several activewear manufacturers offer free downloadable tech pack templates designed specifically for yoga wear, leggings, sports bras, and athletic tops. Professional Software: Tools like Techpacker, Foursource, and Optitex offer cloud-based tech pack creation platforms with collaborative features. These platforms allow you to share tech packs with your factory, track revisions, and manage version control. Some platforms also integrate with PLM (Product Lifecycle Management) systems for larger-scale production management. Working with Your Manufacturer: If you do not have design experience, many manufacturers will build the tech pack with you. Simply send a reference sample, sketches, or photos plus your logo and brand guidelines. The factory's development team creates the tech pack, sources the fabric, and produces a sample for your approval. This is the most common route for first-time brand founders and can significantly accelerate your product development timeline. At Bloomto, we understand that not every brand founder comes from a fashion design background. Our experienced development team works with you to build a complete tech pack from your reference materials — whether you have sketches, photos, a reference garment, or simply a concept and mood board. We provide technical guidance on fabric selection, construction methods, size grading, and branding placement to ensure your tech pack is production-ready. Our in-house pattern makers review your specifications and flag potential issues before sampling begins, saving you time and money on revision rounds. Once your tech pack is finalized, we produce first samples for your approval, then pre-production samples to verify size grading and construction before moving to bulk production. Throughout the process, your tech pack serves as the definitive reference document that guarantees your finished products match your original vision. Ready to develop your activewear collection? Contact Bloomto to discuss your project, or send an inquiry with your sketches and requirements. Our team will help you create a professional tech pack and guide you through every step of the manufacturing process — from first sample to final delivery.What Is an Activewear Tech Pack and Why Is It Essential?
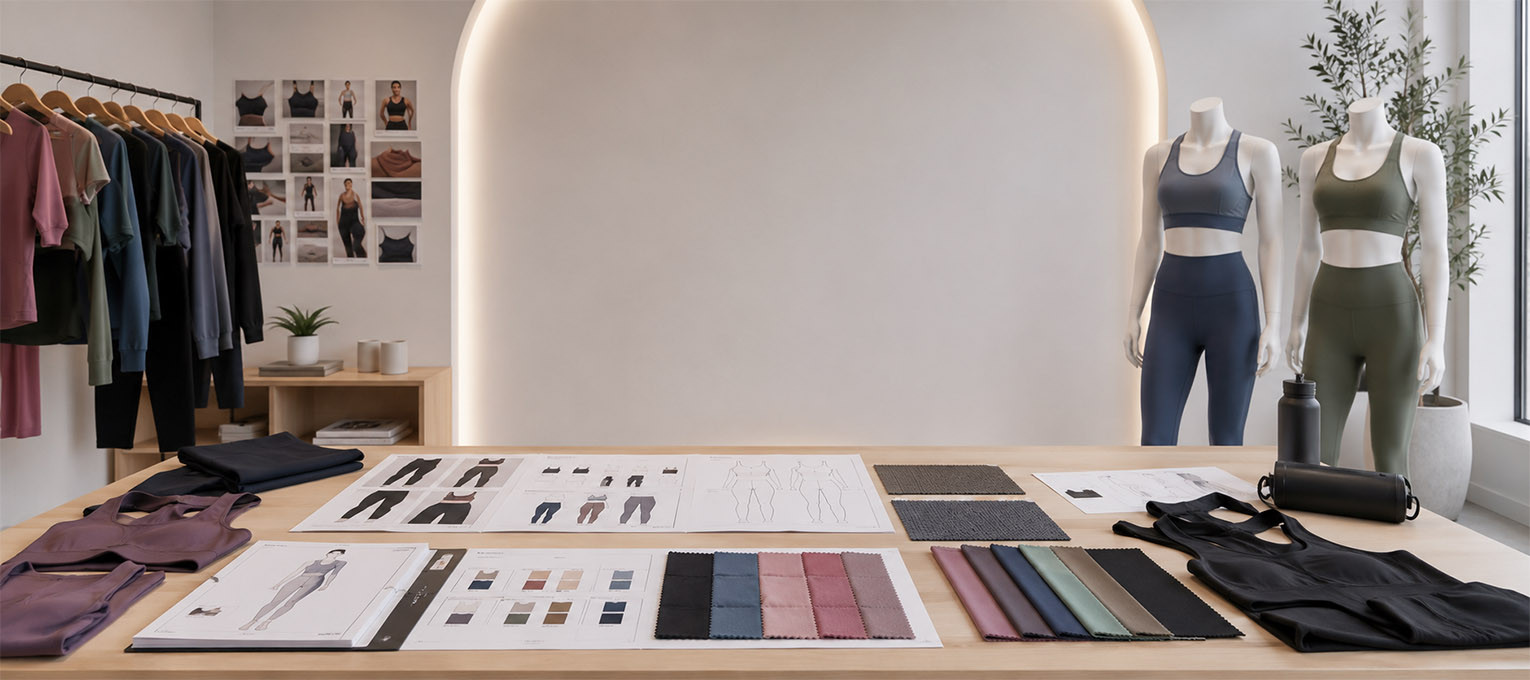
The Core Components of an Activewear Tech Pack
How to Create a Technical Flat Sketch for Activewear
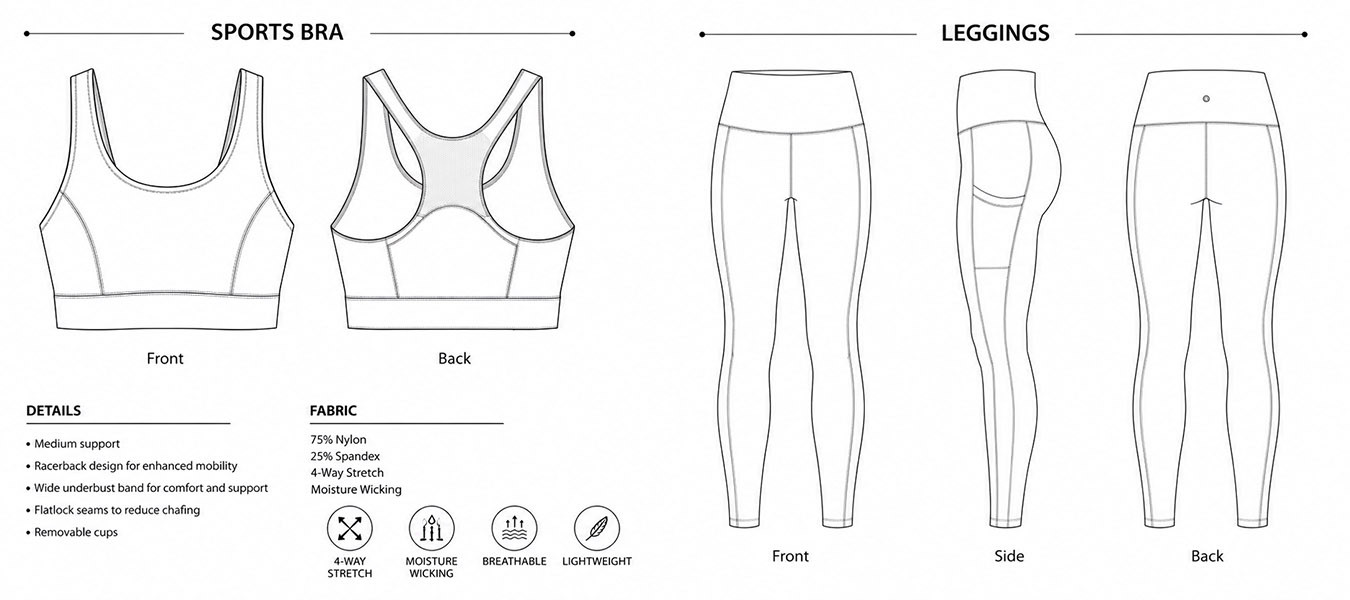
Fabric and Trim Specifications in Detail
Size Chart and Grading Rules
Construction Details and Stitch Specifications
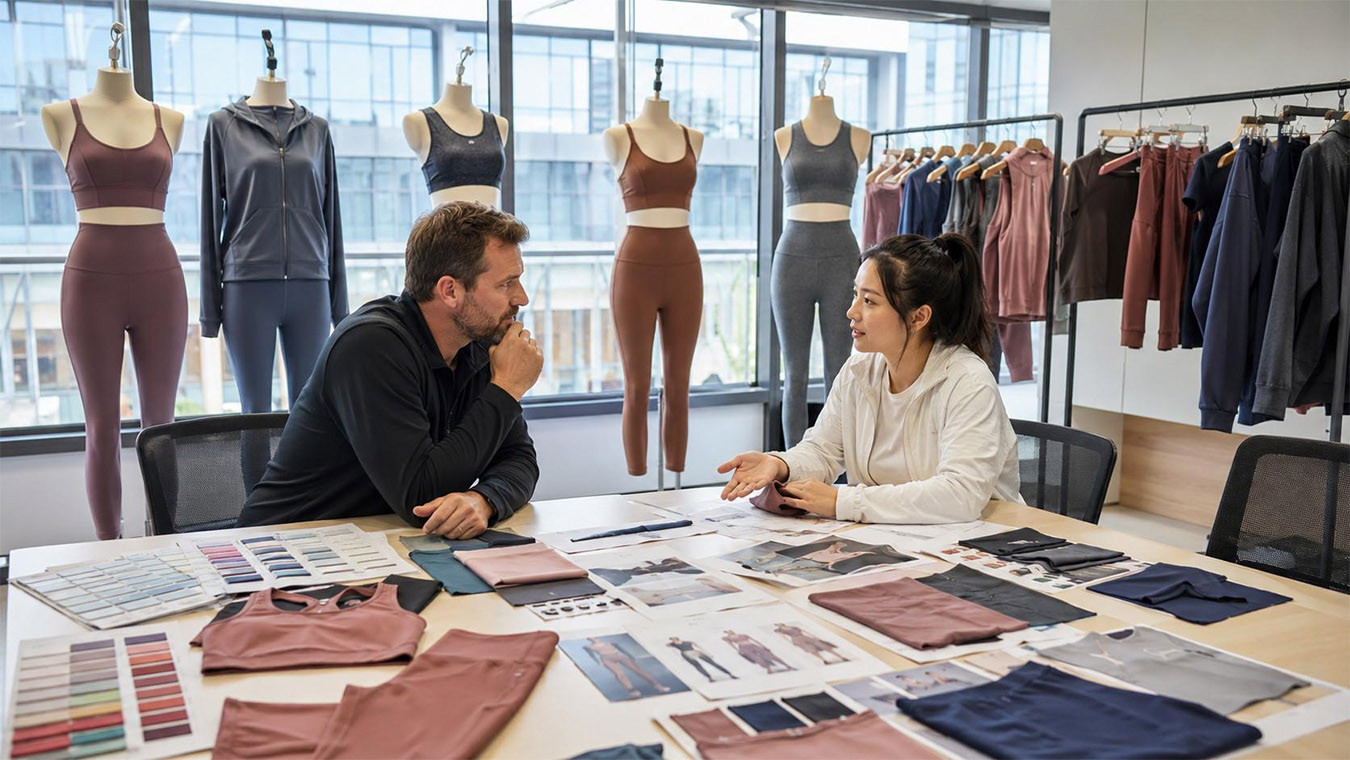
Color Specifications and Pantone References
Logo and Branding Specifications
Common Tech Pack Mistakes and How to Avoid Them
Tech Pack Templates and Tools for Activewear Brands
How Bloomto Helps Brands with Tech Pack Development